New winter rules for Katahdin

Baxter State Park, Maine

Baxter_south_basin-AOCSolo climbers allowed, no minimum group size

Great news! I am packed and ready to go. Maybe I can find some ice up there.

See the park web site for more information. winter rules and regs and the NEice forum for discussion.

Source: post by greenmtnboy

Photo: South Basin from Chimney Pond by AOC

More info from apaulcalypse:

I just got off the phone with Baxter State Park (not sure if it was a ranger, just whoever picks up the 207.723.5140 phone line). According to the woman I spoke with,

a) There is no ‘gear inspection’ on arrival. You do not need to, say, have every item on a checklist, and the rangers will not deny you climbing based on what’s in your pack.

b) Climbing on Katahdin CAN still be closed down in bad weather. I asked for some examples of what constitutes ‘bad weather,’ and she listed wind chills significantly below 0, whiteouts, high avalanche danger, “things of that nature.”

c) Yes, you can climb any route as a party of two. There is no longer a minimum team size.

d) As far as she was aware, there were no designated start / end times for climbs; that is, you can climb whenever you want. She did caution that is inadvisable to be out climbing after the sun goes down, though.

e) Ropeless, technical, free-solo climbing IS allowed. If you want to hike or climb alone, there is a winter solo camping and climbing form to fill out, along with an itinerary. You can climb ropeless alone or with partners. There is no specific hardware rack required, just gear appropriate to the terrain.

– Also see the article By Steve Prettyman Winter Climbing on Mt. Katahdin


Where is the ICE?

What a difference a year makes

I can’t remember a Thanksgiving that I could not climb ice, at least on Mt. Washington. It may happen this year. The ice season has continually gone down hill since mid October 🙁

I wanted to see what last year was like at the this time so I pulled some photos from the NEice Gallery. I wish I had a time machine…..Doug

[nggallery id=6]

Adirondack News

The Bivy, Keene, NY

cell towerThe Bivy has been overtaken by the ever expanding influence of technology. The Bivy now has cell service, 3 bars! What will this mean? Only time will tell.

Season off to a slow start!

But, if you want to climb ice, you can find it!

Al-Tucks11-9-09-Cover

11/8/09 – Alfonzo taking advantage of the beautiful day and of the frozen moss – Off the Boott Spur, Tuckerman Ravine, Mt. Washington NH
Photo by Doug Millen (c) 2009

See more photos

StandardLine

"Power of Light"

Petzl_logo

Petzl, the originator of the modern headlamp, today announced the launch of a global “Power of Light” Photo/Video contest, in line with the launch of the new series of Tikka2 and Zipka2 headlamps.

A jury of international filmmakers and photographers, along with the viewing public, will weigh in on the best photos and videos created on one of two themes: “Illustrate the Power of Light”, or, “What Do You Do with Your Headlamp?”

Entries will be accepted beginning November 1st through December 31st, 2009, and the grand prize winner will receive their weight in Petzl gear – a package worth over $10,000. Loads of runner-up prizes are also up for grabs.

Here’s How It Works

• Participants submit one photograph or one video no longer than 2 minutes maximum on one of two topics:

“Illustrate the Power of Light” or “What Do You Do With Your Headlamp?”.

• A Grand Prize will be awarded for the best video and the best photograph. Each grand prize winner will receive their weight in Petzl gear.

• Runner-up prizes include a full selection of gear for a specified activity, the entire range of TIKKA2/ZIPKA2 headlamps, and more

• Rights-free music will be made available on http://video-contest.tikka2.com for entrants to download for use in videos.

• Awards will be based on criteria of originality, humor, quality and aesthetics.

• Winners will be announced in early 2010.

Jurors and filmmakers Josh Lowell, Sean White and Guillaume Broust have created and posted videos to inspire entrants (as jurors, the aforementioned will not be qualified to compete or win). The video jury includes Guillaume Broust, Bertrand Delapierre, Josh Lowell, and Shaun White. The photo jury features Stephan Denys, Tony Lamiche and Petzl’s own Laurent de Lafouchardiere and John Evans. To tip the scales, the public will have the opportunity to vote online.

For complete contest details, visit Petzl’s contest page http://video-contest.tikka2.com. The site features a cool calculator for entrants to estimate their potential winnings by calculating the equivalency of their weight in Petzl gear.

StandardLine

09/10 Ice Season Under Way!

Pinnacle Gully, Mt. Washington NH

pinnacle-gully-10/15/09Broken Spectre approaches the second belay on Pinnacle Gully, Mt. Washington NH. 10/15/09. The route had to cross the open river at that point to continue.

More Photos

Photo by Alden Pellett – Vermont Daily News.com

Site Make Over!

Welcome to the New NEice!

It has taken me many hrs and some big bucks to do this remake but we celebrate 10 years this year and we needed some new tools! ;-). I upgraded the community board, photopost, classified and the front page. This system will take us well into the future. I have put all I have learned over the last 10 years and the latest technology into this new site, I hope you like it. I still have lots of archival content to post, and the eguide & video sections to complete but we still have to wait for the ice so I have some time, but not much. This year we also have a Facebook and Youtube presence. Enjoy!

This starts the Fall Fund Raiser. Help with the expense of this new site and make a Donation today. Thank you.

I hope it’s a banner ice year!

Let the games begin!……Doug

Please report any errors to doug@neice.com

Rope Tips #1

Skinny Singles: How Thin Can You Go?

by Justropes.com

Modern single ropes keep getting thinner and thinner, pushing the envelope of what is possible for a balance of performance and weight savings. Is a “skinny” single right for you, and if so, how thin you should go? The answers depend on the type of climbing you intend to do with these thin single cords.

“Skinny” single ropes are those below 10 mm in diameter, and they seem to keep getting thinner each season. While these ropes typically range between 9.4 to 9.8 mm in diameter, the cutting edge at present is 9.1 to 9.2 mm (the Beal “Joker” and the Mammut “Revelation”). Maxim will have a new 9.1 mm single in 2006, and the envelope will be pushed even further by a new 8.9 mm single that Mammut will market in 2006!

These thin single cords typically weigh in around a lean 53 grams/meter (for 9.1-9.2 mm), 58 grams/meter (for 9.4-9.5 mm) and 62 grams/meter (for 9.7-9.8 mm). For comparison, a 9.5 mm, 60 m single rope is almost 1.5 pounds lighter than the equivalent 10.5 mm cord! Of course, you don’t get something for nothing. As common sense would dictate, the thinner a rope is, the fewer falls it can hold, and the less durable it will be. Super-thin skinny cords (e.g. 9.1-9.2 mm) have UIAA fall ratings of about 5, while the fall rating improves to about 6/7 for 9.4-9.5 mm ropes, and to about 7/8 for the more beefy 9.7-9.8 mm skinny ropes. Compared to the typical UIAA fall rating of 11 for a 10.5 mm single rope, one can see that the weight savings of skinny singles is gained at the cost of fall rating and durability.

While a few of the skinny singles are UIAA Sharp Edge rated, by far most are not. At present, only the Beal Joker 9.1 mm is UIAA rated for use as both a twin and half/double, as well as single. Using this rope as a twin increases the fall rating substantially.

So, how do you decide if a skinny single is right for you, and just how thin you should go? The key factor in choosing will often be whether you intend to use the rope to climb long, wandering, alpine-style routes, where rope drag will be an issue, or whether you intend to mostly climb routes that are linear and don’t wander, such as typically found at the local ice or rock crag, or cliff. Another important factor is whether you intend to use the rope for hard redpoint/onsight attempts, or for working routes and/or toproping.

Skinny singles are a solid choice for rock/alpine/ice climbers expecting to encounter many pitches and looking to save substantial weight. They still offer a solid safety reserve in terms of falls rating, and on many climbs, any rope drag can be controlled by careful use of longer slings (if the skinny single is also rated as a half/double, it can also be used in this format for any wandering pitches). They are often a great choice for climbers working hard routes for redpoints or onsights, where you don’t want extra pounds holding you down. On the flip side, they are probably not the right choice for working routes or doing a lot of toproping, where a thicker more durable 10+ mm single rope is going to shine. And they are probably not the best choice for use on any type of route, whether alpine, ice, or rock, that is going to wander to the point where the only way to control drag is with a double/half rope system.

As for how thin to go, just remember that the thinner the skinny single, the less falls it will hold and the less durable it is likely to be. So, most climbers considering their first thin cord will likely want to consider something 9.5 mm and up, saving the super-thin cords for redpointing, etc. If you decide to grab one this season, Beal, Esprit, Edelrid, Maxim, Mammut, and PMI all offer a range of great skinny single ropes. Get out there and climb safe!

How to make a V-tread

by Dave Furman

More and more recently I’ve come across all sorts of gear left on ice climbs, left when people rap off or when people can’t finish a route and rap or lower off. In the interest of keeping the chat room posturing to a minimum and to help preserve everybody’s rack, here is how I place a V-thread and retreat from an ice climb. (I feel like I’m uniquely qualified to write this, as I have retreated off of ice climbs in fourteen states, including almost every route at lake Willoughby and in smugglers notch.) A V-thread is stronger than a screw because the surface area of the ice you are supporting your weight on is much greater than that of the threads on an ice screw. Many people don’t trust them however, so what follows is my method of backing up and testing rappel anchors in general, as well as directions for making a V-thread.

Once you’ve decided you’re done, whether you’re at the top of the climb or not, you’ll want to examine your options—if there’s an easy walk-off or if there’s a shiny new bolt station nearby, obviously it may be faster and easier to frig your way over there. That never seems to happen to me, but I do run into all sorts of sketchy looking fixed anchors attached to all manner of trees, shrubs, rocks, blocks, icicles, threads, pins, etc. Usually they have eleventeen different pieces of tat all semi-equalized somehow, and it still looks sketchy. My rule of thumb is always back up my anchor—but that may not mean leaving anything behind. Often what I’ll do is create my own separate anchor, unweighted by the rappel rope through the fixed anchor, so that I have the opportunity to vigorously bounce-test the fixed one. If anything rips, I’m protected by my backup, and then can start leaving all my own gear…more likely the anchor holds even my heavily aggressive more-than-double-my-body-weight testing, and I can safely clean my backup (after my partner completes the rappel) without leaving a thing behind. I do the same thing with fixed V-threads. Place a screw or two far enough away that if the thread rips it won’t undermine your placement, and clip it to the rappel rope as well—it’s important that the rappel rope does not weight your backup anchor, or you won’t be testing the fixed one. This way, any anchor you see on the ice, as well as most tree and pin anchors, can be tested to ensure their solidity. It doesn’t hurt to carry a small knife, some extra cord or web and a couple rings to replace (not just add to) the really ratty fixed stuff.

To place a V-thread, first find the area of solid ice that has the least air pockets or cracks through it. It helps to find a small pillar or convexity, as this will aid in placing the holes for the thread. Place the longest screw you can in the ice, at an angle and location that will allow you to drill another screw to meet the first hole (the convexity allows you to place a hole on either side of it, increasing the size of the ice column in between). It is nice to leave the first screw partially in the ice so you can use it as a gauge for the correct angle and location for the second screw. You will be able to see the second screw intersect the hole from the first. Push a piece of cord or 11/16’’ web through one hole, and pull it out the other with the hook you brought with you. (This can be either a homemade job from coat hanger, or a pre-fab one—several are available, Charlet Moser makes a good one that is easily available. See directions below to make one) Tie the ends of the cord together, and you’re done. If the hole is shallow, or cracked, or hollow ice, or you’re just into public service, place a second thread 18’’ or so above the first, so that the rappel rope weights the two cords equally. If you practice, this really only takes five minutes to make a double thread anchor—I’ve often been able to place a thread between the time that my partner finishes a pitch, calls off belay and finishes constructing an anchor, and when they put me on belay.

To make a v-thread tool, get one of the all-wire heavy-gauge coat hangers from your closet, and cut a piece of wire about fourteen inches long. Bend one end to form a loop that you can clip to a carabineer. Bend the other end into a hook that will easily fit through the inside of one of your ice screws, and sharpen the point of the hook with your file. You’re done. I fold mine into a loop, hooking the hook end through the loop so it doesn’t catch on my precious gore-tex, but be careful of this as the wire will fatigue and break before too long—luckily they’re really cheap! Good luck and be safe!

See an update from Dave, and comments below

IN PRACTICE – #2

By Scott Backes
Alpine Mentoring.com

Alpine Mentors  Canada Alpine Climbing

“IN PRACTICE”

What separates a good day of climbing waterfalls from a bad one? In the first half of this In Practice piece, we dealt with the physical factors that influence our ascents. This second half deals with a much more nebulous and individual topic. What psychological and mental attitudes are responsible for our experiences on the ice? What can we do to influence them, and what pitfalls do we need to avoid? Obviously the answers to these questions are as varied and numerous as the individuals who climb ice. There are, however some general principals and techniques that all of us can use to put ourselves in the best possible mind-frame given our circumstances. These ideas and practices will be the focus of this In Practice piece.

When I was younger my need for recognition from my peers, and my desire to prove myself to myself often drove me to undertake ascents of ice-climbs at or above my ability. These “skin of the teeth” ascents were often begun with a samurai’s nonchalance towards the outcome. But, when grappling with the ice itself, it was mostly a different story. Often shaking with fear and failing upwards, I would flail my way to the top. These are the experiences of youth and some of you will be driven to this path. This is what is called surviving the learning curve. I cannot recommend this course, but I will put a few addendum’s on it.

When you find yourself above your head in a dire predicament stop and breathe. Slow deep breaths can do as much for calming panic as anything. If you ice tools are secure, close your eyes for a few deep breaths. Just slowing your breathing and closing your eyes will give you back some of your perspective. After your break, steel yourself to the climbing above. What I mean by this, is you must accept where you are at and accept what work must still be done. Feet are often neglected when we are afraid. Take the time to look down and find good features to stand, at the least look for solid-non-chandeliered ice to frontpoint into. When I am afraid there is a tendency to stop looking anywhere but at the ice directly in my vision. I know this about myself, so I make a conscious decision to keep looking around at my environment. So many, many times when I stop to look, there is some feature to stem to, or some mushroom I can do a back-step or drop-knee on. If your arms are so tired that you can’t control your swing, you must drop one arm at a time, resting it enough to get a good controlled swing. Each placement must be tested before you drop the next arm. It is a slow excruciating experience, but I have managed on several occasions to climb the last half of a pitch using this method. If you can find the will to stay with it, if you can accept the discomfort and pace, you can make it off the climb (at least physically) intact.

So often I have seen climbers let panic overtake their skills. I see them hurrying their placements, or pulling on tools that I wouldn’t trust in a million years. Their feeling of panic is so painful to them, so overwhelming to them that they will do anything to make it cease, they will do anything to get it over with-even if it means risking their lives. Some times they get away with it-sometimes they don’t. But, the mistake they have all made is too let panic rule them. The difference between surrendering to panic and using your fear to propel you to the top, is attitude. Before you even get out of the car, think about the breathing and use your own reservoir of experiences to consider how you have gotten yourself out of difficult situations in the past. If you believe there is a way out, there is. If your panic adds hopelessness to its burden of overwhelming fear; there is a good chance you will be lost. If you can summon hope based on past experiences, and then focus it on the situation at hand, the deep breathing and some methodical climbing will bring you back from the edge.

As I continued my arc towards ice climbing excellence, I started applying my hard-earned knowledge to each new challenge. Instead of the Samurai’s nonchalance, I adopted the attitude of the journeyman. I had a quiver of techniques and mindsets that I applied as needed. The fear of the unknown became the fear of the known, which for me is much more easily managed. My systems were ingrained to a degree, that I was able once I left the ground to forget about them. This left more time for strategy and creativity.

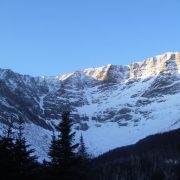
As you approach your objective, take the time to view the route from a distance. See the formation’s cruxes and its natural rests. Consider in your mind how much energy and mental strain will be required for each of the difficult sections and how much you think you can get back from the rests. Plot out ahead of time which aspect of the route you will climb. If you haven’t scoped the route out from a distance, once you get right underneath it, all objectivity and route choices go out the window. I can’t tell you how many times I’ve started up a route by what from underneath it looked like the wrong way, only to have my earlier scouting vindicated high up on the route. This however is not an absolute, sometimes when you are standing at the bottom; a better way-a way unseeable from a distance will present itself. Even so the work you did on the approach will still be of service. You will still know what is coming next. By keeping an open mind and by providing yourself with more options, you have spiritually strengthened your resolve and multiplied your chances for success.

Take your time at the base of the climb to secure a belay that is safe from falling ice, and one that you as the leader will have confidence in. If you have correctly positioned and set up the belay, it will be the last time you will need to concern yourself with it. You won’t be taken out of the moment by your partner shouting at you to quit knocking ice on him. You won’t have to consider when you are at the crux runout whether or not the belay will hold. Be methodical racking up and preparing your tools and yourself for the ascent. It is easy when you have adrenaline clanging around in your head to try and hurry. Usually, this results in something being dropped, something being left behind or gear being haphazardly organized. The hurried mindset carries over to the lead and it is a short step from there to panic. I am known for my speed ascents, but rarely do I hurry. I move continuously with intent and by the end of a day I have covered immense amounts of terrain. I take the time to chop away the surface ice for every screw placement, but I put each screw in at my waist to minimize the strength required to turn it and then clip it into the rope. As soon as the screw is in, I start climbing with focus and to emphasis the point again, with intent. I am always amazed at how quickly the screw is twenty or thirty feet below me, and how quickly I am at the belay.

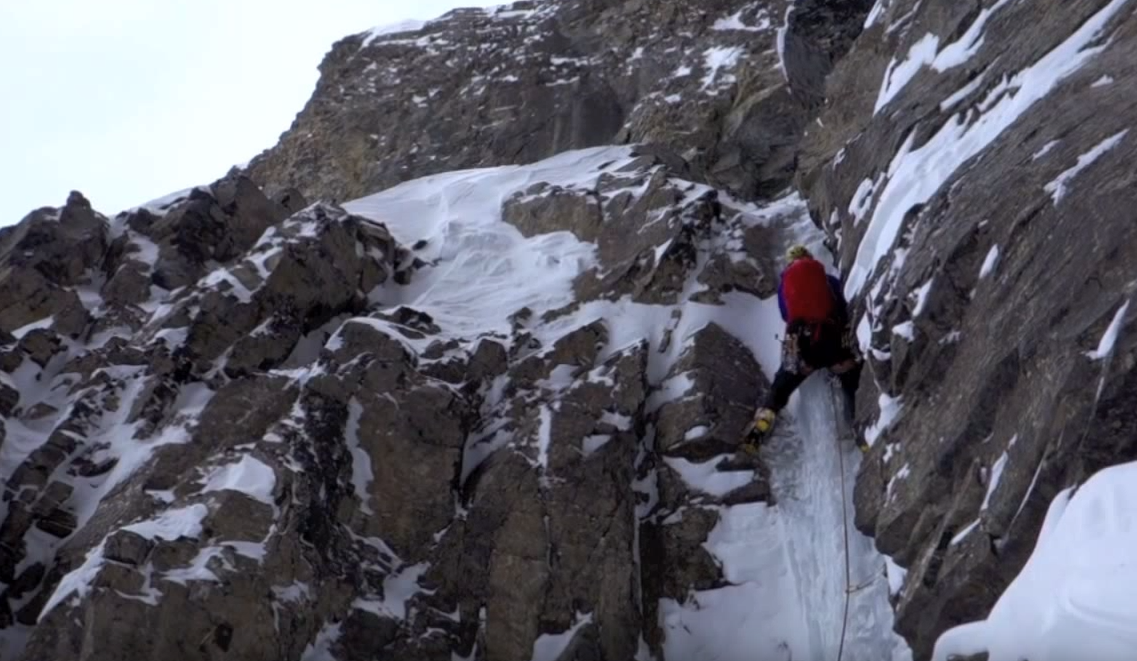
For most of us, looking up at the first section of the climb is intimidating. The ice doesn’t look so good and the angle seems too steep for our abilities. There is a reason for this…its because its true. As I mentioned in the first piece, the first thirty to forty feet of most ice climbs is the crux. When you take that moment to compose yourself right before you start, think back to what you saw on the approach and what you’ve seen on other climbs you’ve led. The knowledge that most pillar climbs let off after the first bit can give you confidence to punch through that beginning section and get into the better ice just above. Perhaps the best compliment I was ever paid, was when one of my partners remarked to a mutual friend, “you can tell that Backes is headed for the belay”. I start up that first difficult section with fear and uncertainty in my heart, but also with a bigger measure of decisiveness and confidence that at the end of the struggle, I’ll be shouting down to my partner “off belay”

As I said earlier, there are as many strategies to cope with fear and panic, as there are climbers, but the ideas I’ve talked about here are pretty universal. The main idea with these pieces is to get you to think about your climbing from a different angle. I have found my greatest jumps in ability have come from new understandings of my self. If you are honest about what you fear and why, you can figure out methods to cope with them. In my experience, it is when I try to deny fear that it has the greatest hold on me.

Scott Backes