AMGA Steep Ice Tips YouTube

AMGA – Steep Ice Tips

Peter has ticked off many new tricky ice and mixed climbs in the Northeast over his career. He has a good sense of where and when things are happening and the expertise to climb them.

To find out what clinics Peter will be teaching at the 2016 Mt. Washington Valley Ice Fest, go to The MWV Ice Fest Blog. They have an incredible offering of Instructional Courses for all levels of experience, and a list of guides that just can’t be beat, in the northeast.

Related Stories on Peter:


Sometimes the Leader Does Fall

A Look Into the Experiences of Ice Climbers Who Have Fallen on Ice Screws

by Kel Rossiter / Adventure Spirit 

Sometimes the Leader Does Fall

INTRODUCTION

Last winter a climber with Adventure Spirit Rock+Ice+Alpine was asking me about the holding power of ice screws. We discussed the various lab studies that have been done (a list of links to some interesting ones can be found at the bottom of this paper) then he said, “That’s great, but has anyone ever specifically done research into how they actually perform in the field?” He had a point. While the dictum in ice climbing is that “the leader never falls,” in the end, they sometimes do. So presumably there was an ample population from which to sample—but I was unaware of any actual field research done with this population. So, fueled by that question, I decided to explore the topic. The results of this inquiry appear below.


Related articles:

Ice Climbing Anchor Strength

Protecting The Ice We Climb


Ice screw placement, anchors and V-threads

A great film by Petzl on proper ice screw placement technique, as well as how to set an anchor and a v-thread.

Ice climbing basics: Ice screw placement, anchors and V-threads [EN] from Petzl-sport on Vimeo.This film demonstrates proper ice screw placement technique, as well as how to set an anchor and a v-thread in waterfall ice. We will discuss the key technical elements, but remember that when swinging your tools into the ice, it is crucial to understand the medium on which you are climbing. The quality of the ice, its structure, the terrain above, recent changes in temperature – all these factors and others must be considered before you step off the ground and onto the ice.

www.petzl.com/LASER

Training for the new alpinism

Training for the New Alpinism

Training for the new alpinism

Training for the new alpinism

In Training for the New Alpinism, Steve House, world-class climber and Patagonia ambassador, and Scott Johnston, coach of U.S. National Champions and World Cup Nordic Skiers, translate training theory into practice to allow you to coach yourself to any mountaineering goal.

“Training for the New Alpinism is a manual that guides you in constructing a simple, progressive training program lasting from six weeks to a year and beyond. The book has been heralded as a road-map to greater alpine climbing success for climbers of all abilities”

Get a copy here

DMM Testing: SLINGS AT ANCHORS

SLINGS AT ANCHORS

October 4, 2013

A great video and report on the forces at work on slings in four different belay set-ups.

In a previous video we compared the impact forces generated using nylon and Dyneema® slings with a dynamic load. It clearly highlighted the importance of ensuring there is no slack in a system using slings. As an example, a 85 kg mass free-falling just 60 cm on to a 60 cm Dyneema sling (fall-factor 1), with an overhand knot in it, generated enough force to break the sling.

Extending this previous theme we’ve looked at using nylon and Dyneema® slings in four different belay set-ups

-DMM

I have always tied in with both ropes and used clove hitches…seems like this is the best way to tie in. – Doug Millen

Ice Climbing Anchor Strength

Camping Trip Planner

New Smartphone App by Jimbl

Android System

A Camping planner pre-populated and customizable

A configurable planner with everything needed for any camping trip. Comes pre-populated with more than 225 camping items. If you are a camping person, this is all you need to ensure you don’t forget anything. Check/uncheck and reuse every-time you go on camping trips. Save all the time typing the camping list. Easy and very intuitive thumb friendly check/uncheck options.

So customizable that it could be configured for any trip…easy to use and it will share the list via popular networks and email.

Great App!

Worth every penny. At $.99 how can you go wrong. Find it at the marketplace on your android phone. Or  Go to the Web Site

Doug

Rope Tips #1

Skinny Singles: How Thin Can You Go?

by Justropes.com

Modern single ropes keep getting thinner and thinner, pushing the envelope of what is possible for a balance of performance and weight savings. Is a “skinny” single right for you, and if so, how thin you should go? The answers depend on the type of climbing you intend to do with these thin single cords.

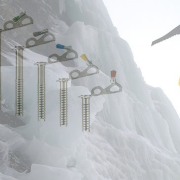
“Skinny” single ropes are those below 10 mm in diameter, and they seem to keep getting thinner each season. While these ropes typically range between 9.4 to 9.8 mm in diameter, the cutting edge at present is 9.1 to 9.2 mm (the Beal “Joker” and the Mammut “Revelation”). Maxim will have a new 9.1 mm single in 2006, and the envelope will be pushed even further by a new 8.9 mm single that Mammut will market in 2006!

These thin single cords typically weigh in around a lean 53 grams/meter (for 9.1-9.2 mm), 58 grams/meter (for 9.4-9.5 mm) and 62 grams/meter (for 9.7-9.8 mm). For comparison, a 9.5 mm, 60 m single rope is almost 1.5 pounds lighter than the equivalent 10.5 mm cord! Of course, you don’t get something for nothing. As common sense would dictate, the thinner a rope is, the fewer falls it can hold, and the less durable it will be. Super-thin skinny cords (e.g. 9.1-9.2 mm) have UIAA fall ratings of about 5, while the fall rating improves to about 6/7 for 9.4-9.5 mm ropes, and to about 7/8 for the more beefy 9.7-9.8 mm skinny ropes. Compared to the typical UIAA fall rating of 11 for a 10.5 mm single rope, one can see that the weight savings of skinny singles is gained at the cost of fall rating and durability.

While a few of the skinny singles are UIAA Sharp Edge rated, by far most are not. At present, only the Beal Joker 9.1 mm is UIAA rated for use as both a twin and half/double, as well as single. Using this rope as a twin increases the fall rating substantially.

So, how do you decide if a skinny single is right for you, and just how thin you should go? The key factor in choosing will often be whether you intend to use the rope to climb long, wandering, alpine-style routes, where rope drag will be an issue, or whether you intend to mostly climb routes that are linear and don’t wander, such as typically found at the local ice or rock crag, or cliff. Another important factor is whether you intend to use the rope for hard redpoint/onsight attempts, or for working routes and/or toproping.

Skinny singles are a solid choice for rock/alpine/ice climbers expecting to encounter many pitches and looking to save substantial weight. They still offer a solid safety reserve in terms of falls rating, and on many climbs, any rope drag can be controlled by careful use of longer slings (if the skinny single is also rated as a half/double, it can also be used in this format for any wandering pitches). They are often a great choice for climbers working hard routes for redpoints or onsights, where you don’t want extra pounds holding you down. On the flip side, they are probably not the right choice for working routes or doing a lot of toproping, where a thicker more durable 10+ mm single rope is going to shine. And they are probably not the best choice for use on any type of route, whether alpine, ice, or rock, that is going to wander to the point where the only way to control drag is with a double/half rope system.

As for how thin to go, just remember that the thinner the skinny single, the less falls it will hold and the less durable it is likely to be. So, most climbers considering their first thin cord will likely want to consider something 9.5 mm and up, saving the super-thin cords for redpointing, etc. If you decide to grab one this season, Beal, Esprit, Edelrid, Maxim, Mammut, and PMI all offer a range of great skinny single ropes. Get out there and climb safe!

How to make a V-tread

by Dave Furman

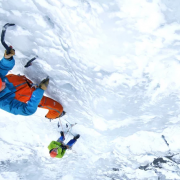
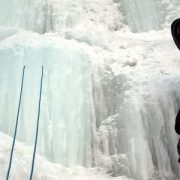
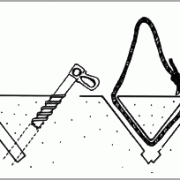
More and more recently I’ve come across all sorts of gear left on ice climbs, left when people rap off or when people can’t finish a route and rap or lower off. In the interest of keeping the chat room posturing to a minimum and to help preserve everybody’s rack, here is how I place a V-thread and retreat from an ice climb. (I feel like I’m uniquely qualified to write this, as I have retreated off of ice climbs in fourteen states, including almost every route at lake Willoughby and in smugglers notch.) A V-thread is stronger than a screw because the surface area of the ice you are supporting your weight on is much greater than that of the threads on an ice screw. Many people don’t trust them however, so what follows is my method of backing up and testing rappel anchors in general, as well as directions for making a V-thread.

Once you’ve decided you’re done, whether you’re at the top of the climb or not, you’ll want to examine your options—if there’s an easy walk-off or if there’s a shiny new bolt station nearby, obviously it may be faster and easier to frig your way over there. That never seems to happen to me, but I do run into all sorts of sketchy looking fixed anchors attached to all manner of trees, shrubs, rocks, blocks, icicles, threads, pins, etc. Usually they have eleventeen different pieces of tat all semi-equalized somehow, and it still looks sketchy. My rule of thumb is always back up my anchor—but that may not mean leaving anything behind. Often what I’ll do is create my own separate anchor, unweighted by the rappel rope through the fixed anchor, so that I have the opportunity to vigorously bounce-test the fixed one. If anything rips, I’m protected by my backup, and then can start leaving all my own gear…more likely the anchor holds even my heavily aggressive more-than-double-my-body-weight testing, and I can safely clean my backup (after my partner completes the rappel) without leaving a thing behind. I do the same thing with fixed V-threads. Place a screw or two far enough away that if the thread rips it won’t undermine your placement, and clip it to the rappel rope as well—it’s important that the rappel rope does not weight your backup anchor, or you won’t be testing the fixed one. This way, any anchor you see on the ice, as well as most tree and pin anchors, can be tested to ensure their solidity. It doesn’t hurt to carry a small knife, some extra cord or web and a couple rings to replace (not just add to) the really ratty fixed stuff.

To place a V-thread, first find the area of solid ice that has the least air pockets or cracks through it. It helps to find a small pillar or convexity, as this will aid in placing the holes for the thread. Place the longest screw you can in the ice, at an angle and location that will allow you to drill another screw to meet the first hole (the convexity allows you to place a hole on either side of it, increasing the size of the ice column in between). It is nice to leave the first screw partially in the ice so you can use it as a gauge for the correct angle and location for the second screw. You will be able to see the second screw intersect the hole from the first. Push a piece of cord or 11/16’’ web through one hole, and pull it out the other with the hook you brought with you. (This can be either a homemade job from coat hanger, or a pre-fab one—several are available, Charlet Moser makes a good one that is easily available. See directions below to make one) Tie the ends of the cord together, and you’re done. If the hole is shallow, or cracked, or hollow ice, or you’re just into public service, place a second thread 18’’ or so above the first, so that the rappel rope weights the two cords equally. If you practice, this really only takes five minutes to make a double thread anchor—I’ve often been able to place a thread between the time that my partner finishes a pitch, calls off belay and finishes constructing an anchor, and when they put me on belay.

To make a v-thread tool, get one of the all-wire heavy-gauge coat hangers from your closet, and cut a piece of wire about fourteen inches long. Bend one end to form a loop that you can clip to a carabineer. Bend the other end into a hook that will easily fit through the inside of one of your ice screws, and sharpen the point of the hook with your file. You’re done. I fold mine into a loop, hooking the hook end through the loop so it doesn’t catch on my precious gore-tex, but be careful of this as the wire will fatigue and break before too long—luckily they’re really cheap! Good luck and be safe!

See an update from Dave, and comments below